Mallori Lane
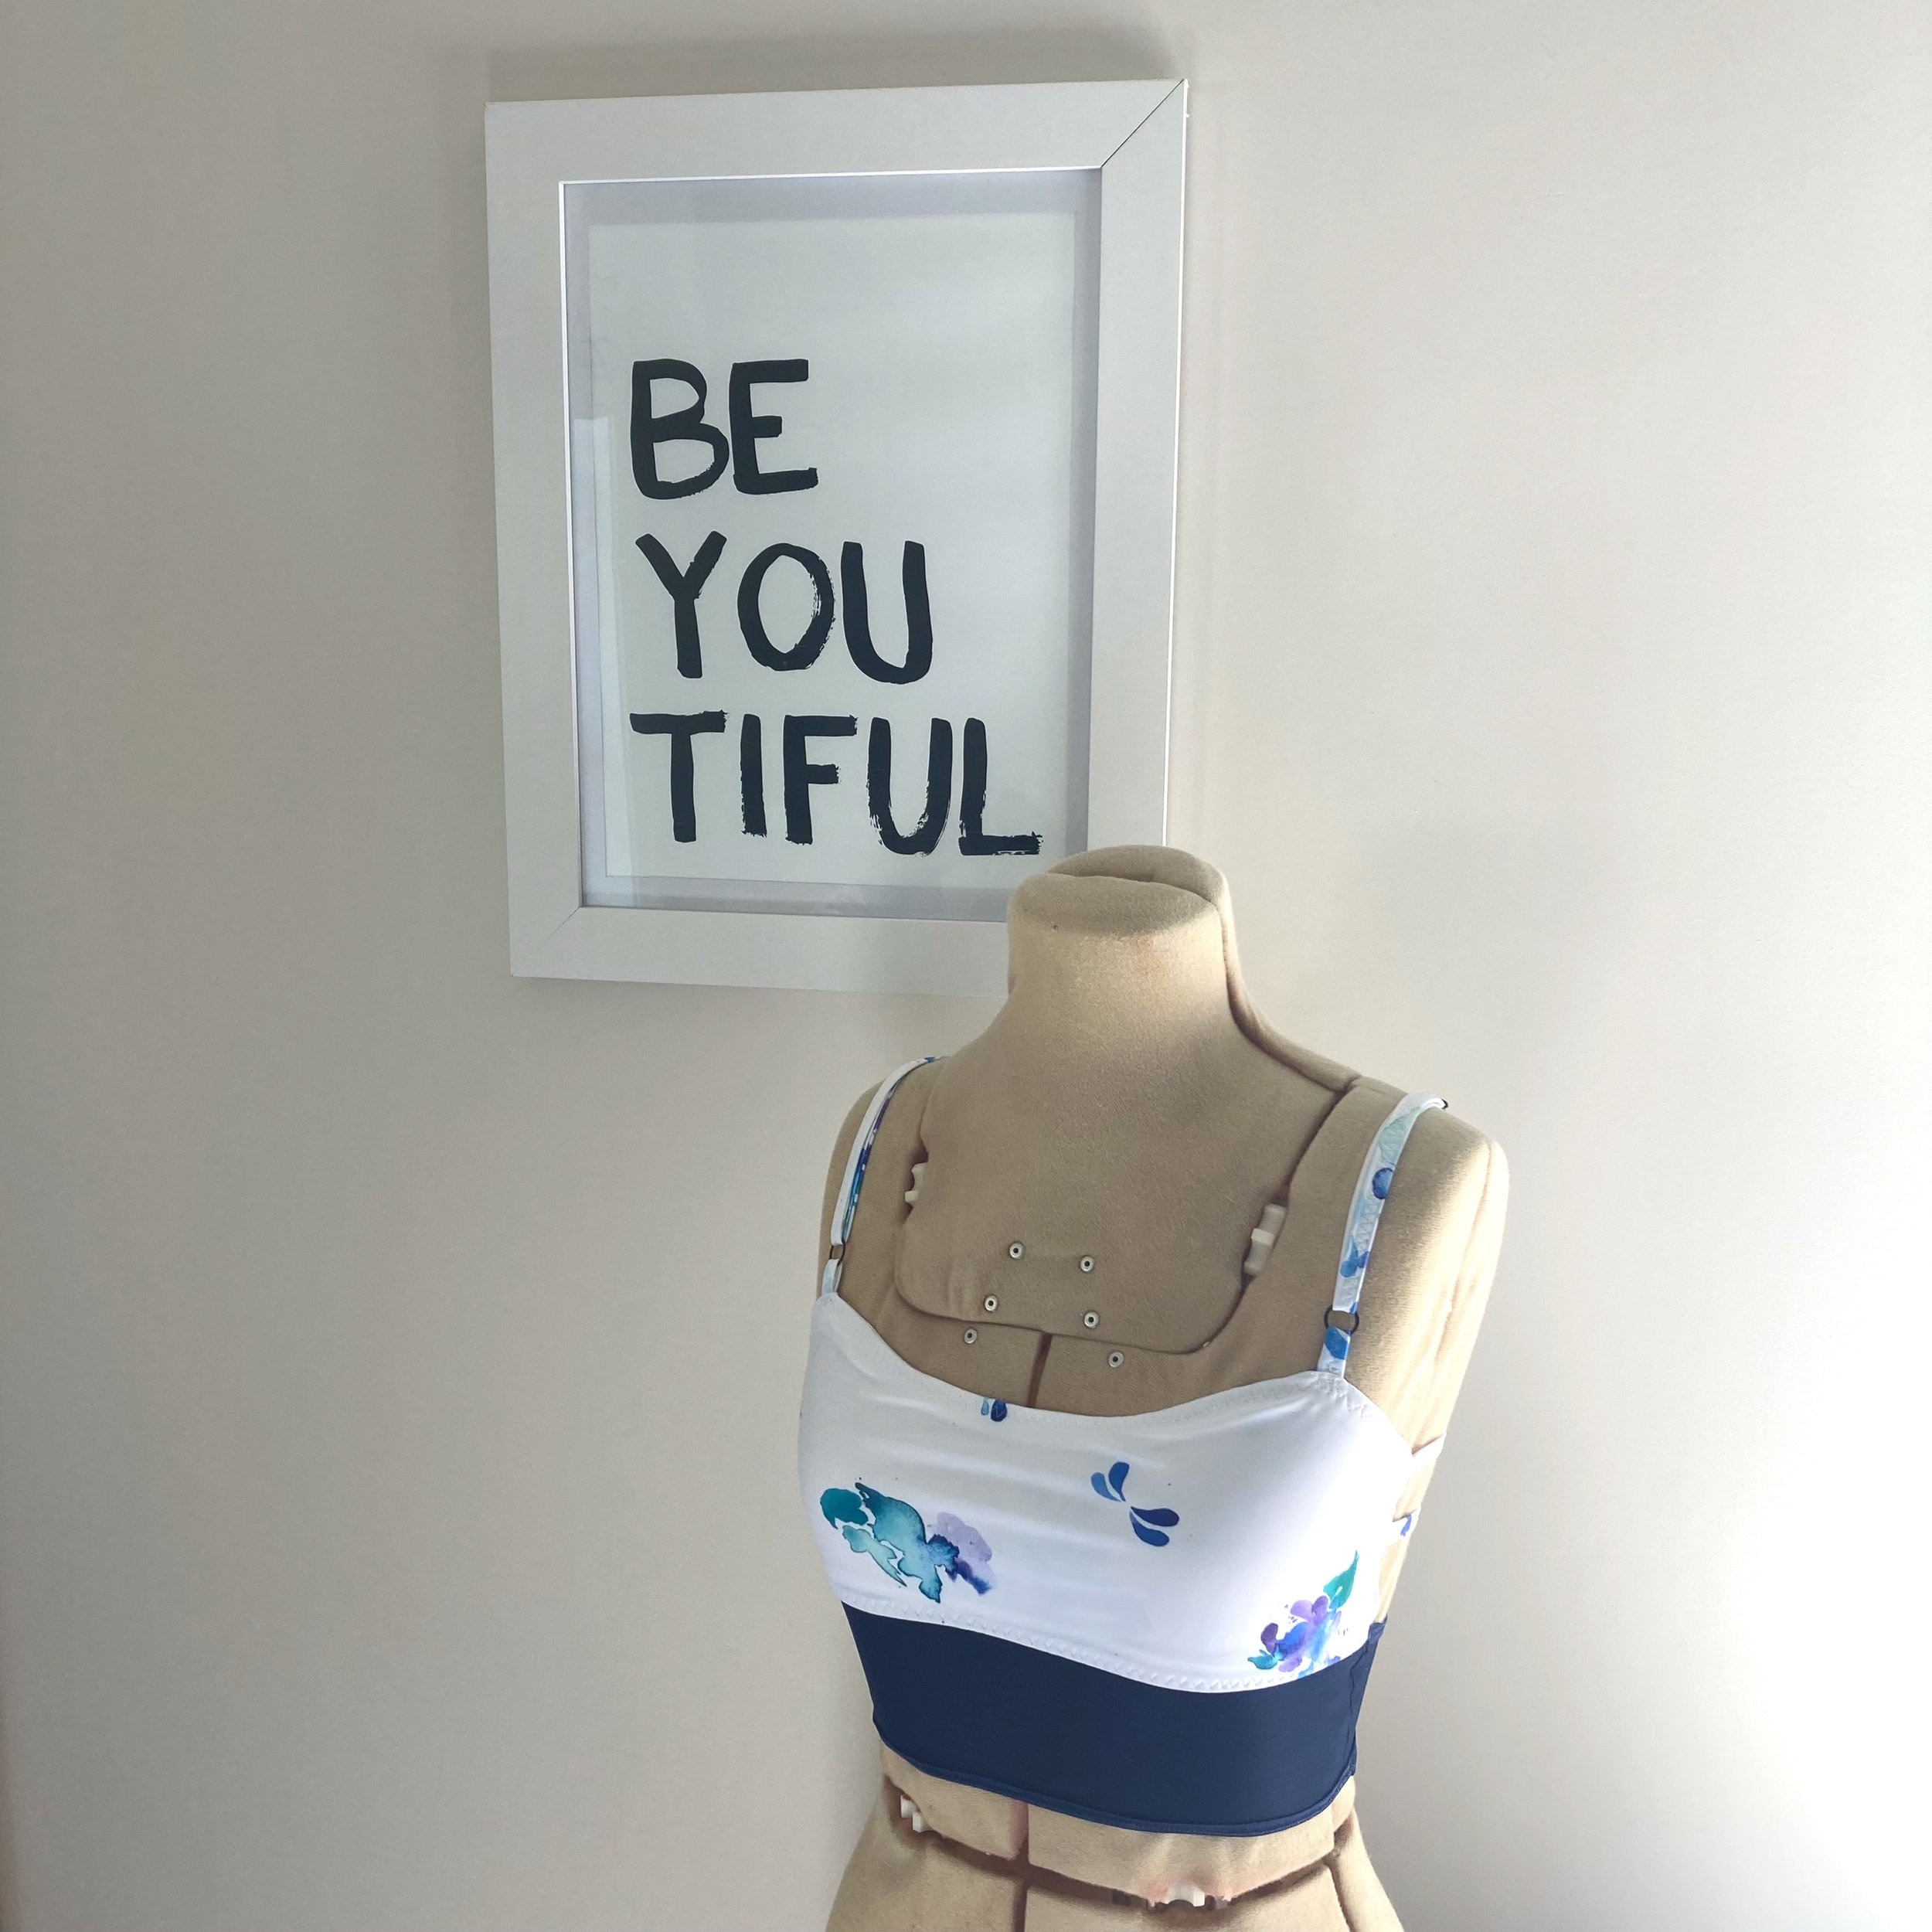
Mallori Lane front view
Pattern: Mallori Lane by Madalynne
Pattern Size: X-Small
My Measurements: Bust 83cm, Under-bust 77cm
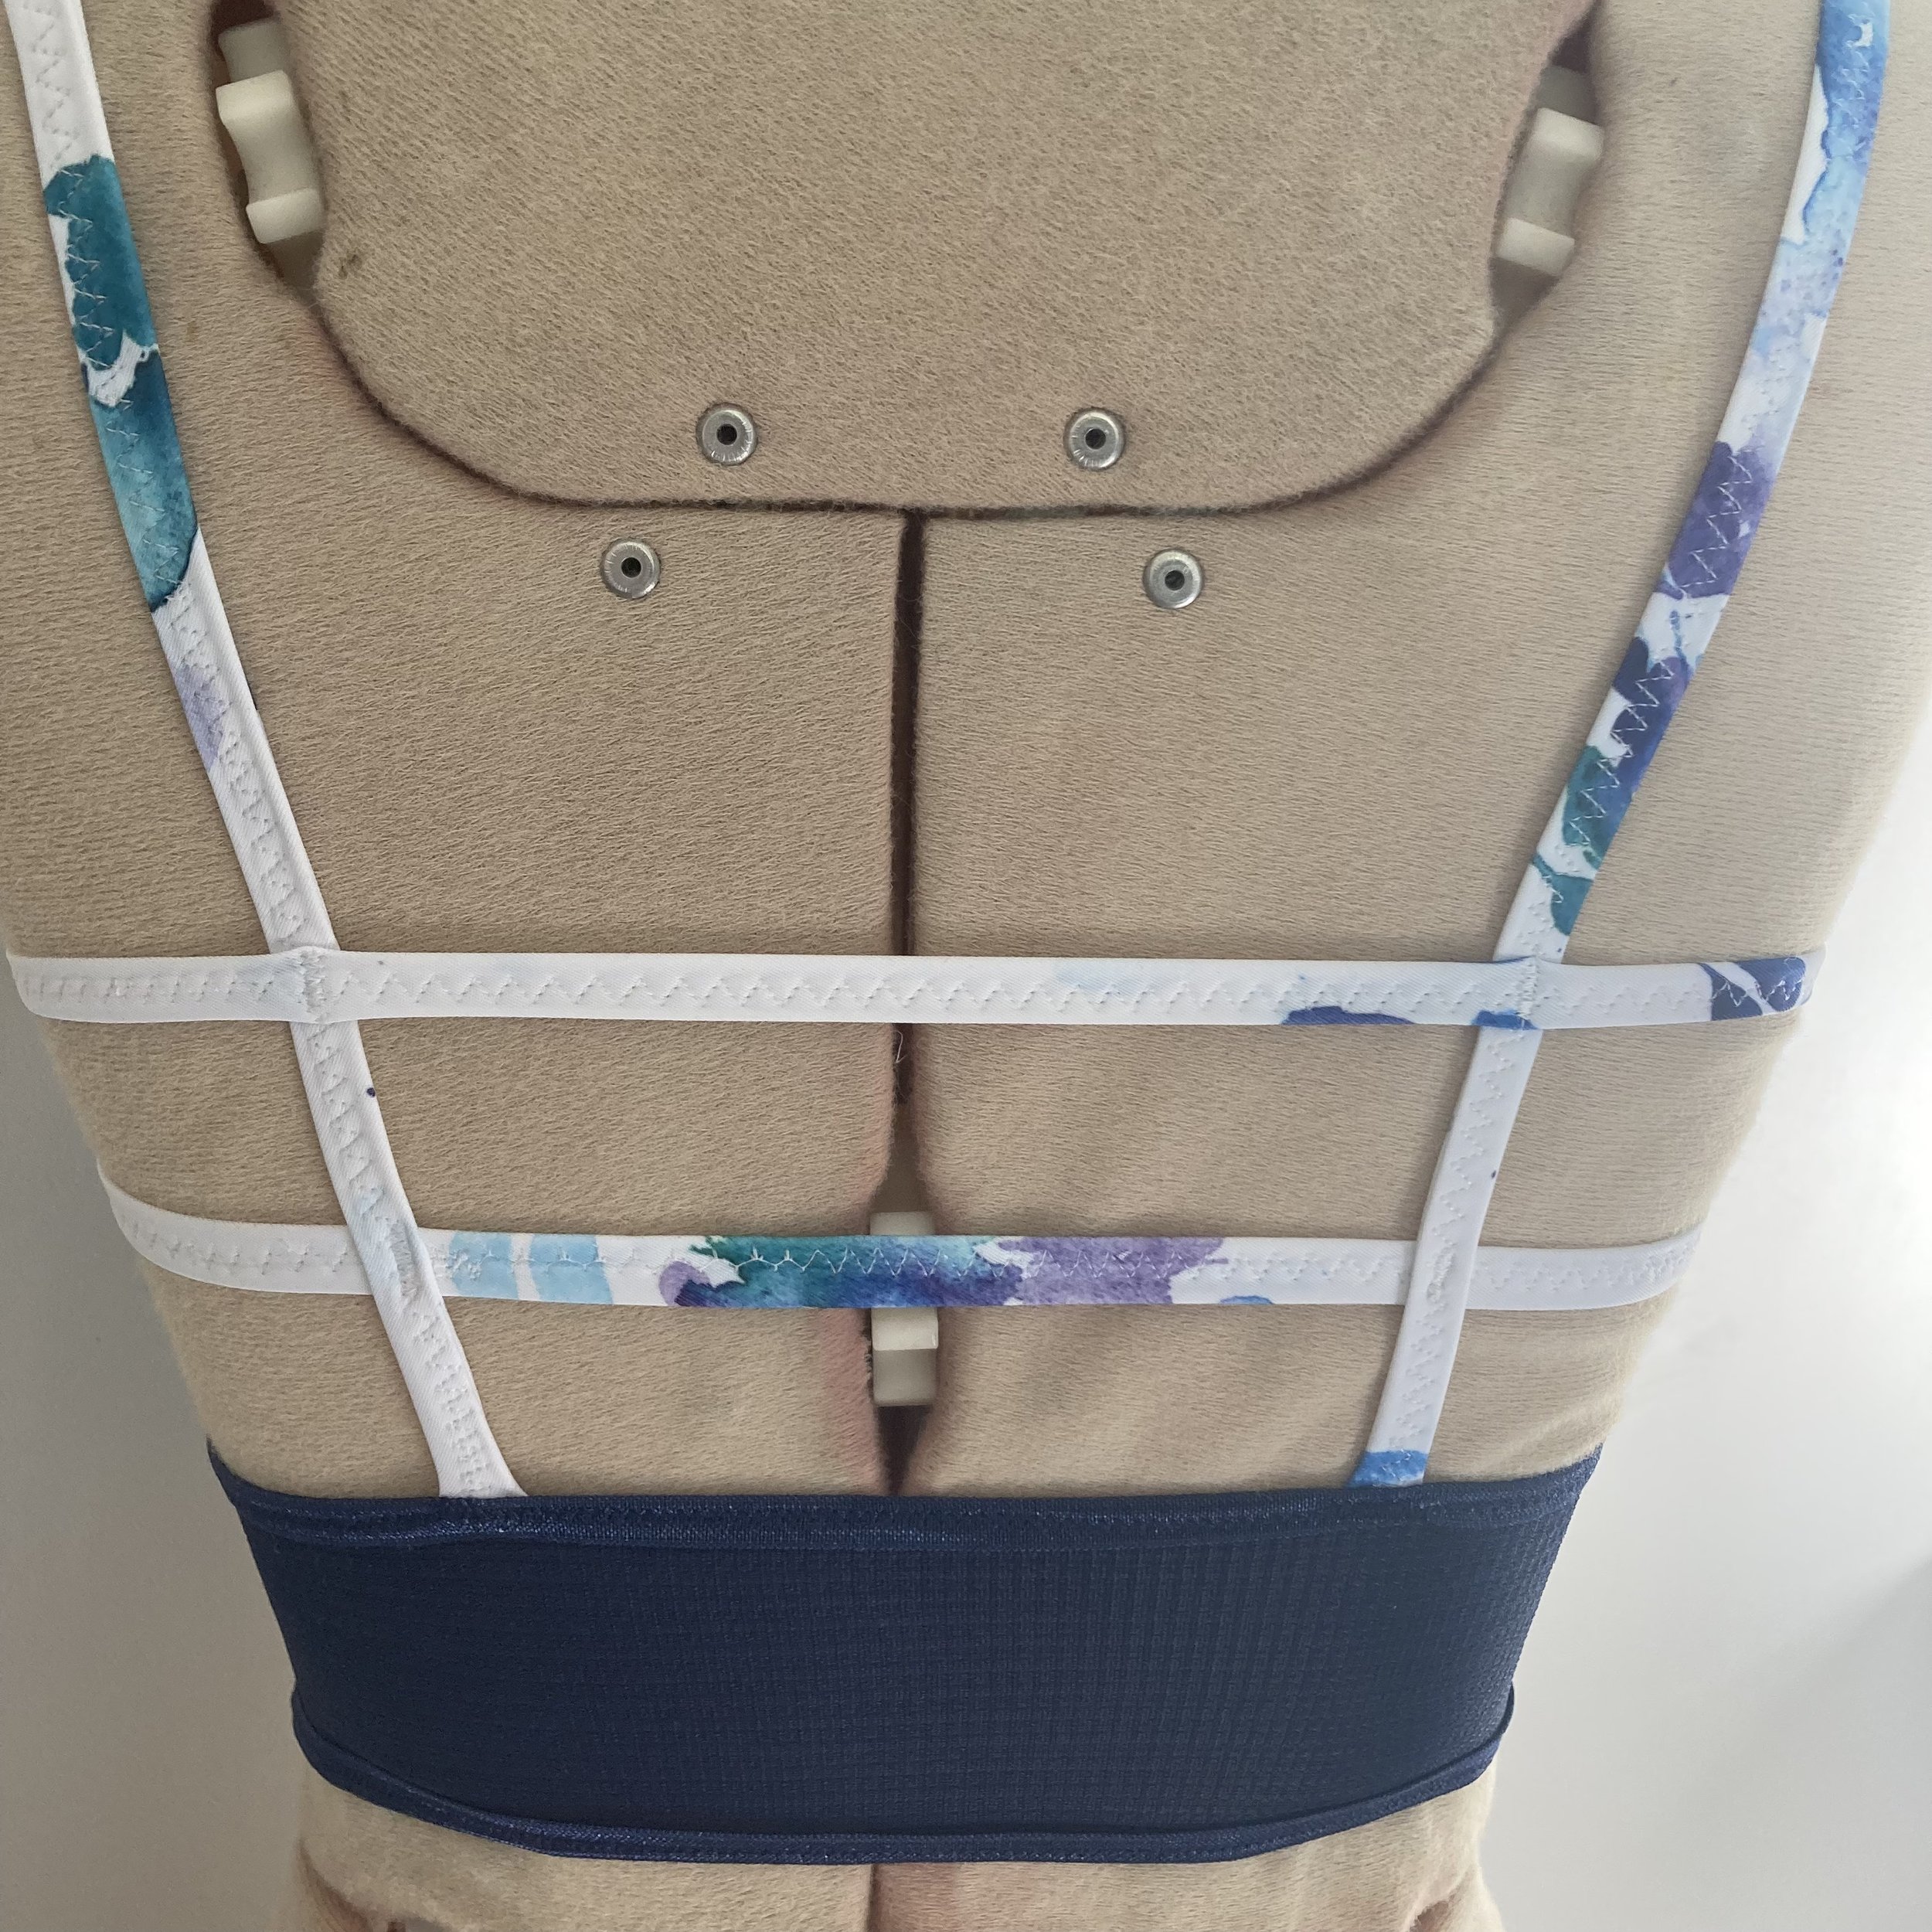
Pattern Adjustments: Lined front, homemade strapping, omitted side channeling, bar tack at strap cross over junctions
Fabric: Main top - Recycled nylon swimwear, 2019 Dragonfly Collection - Watercolour White designed by Helen Cloke of Nellie Joans; Main bottom - Navy blue stretch mesh from Drapers Fabrics
Notions: Black 12mm ring and sliders from Nellie Joans; White picot elastic and navy blue fold over elastic from stash
Machines: Brother Galaxie and 3034D Lock Overlocker (Bother)
This project is part of mission WIP. I am slowly working my way through all cut out or half finished WIP in the hope that a clear workspace will allow for more creative freedom and a headspace to embark on new skills and makes. This project was one of experimentation, taking a bralette pattern/method and adapting it to be a fun sports bra by using supplies only in my stash. The experimentation mindset is very evident in the finish as it is not 100% perfect, but methodically adapting a pattern on the go generally results in a few “if I did it again I would do this” moments (especially when the process is spread over a few years).
The pattern is the Mallori Lane bralette by Madalynne. The instructions are more of a method rather than full blown laid out instructions someone would expect in a pattern. Being a free download, the method is clear for what it is and with a little previous experience in bralette or bra construction anyone could tackle this project.
I had some wonderful navy blue sports mesh I picked up from Drapers Fabrics many moons ago while visiting my dad in Auckland, I have been waiting for the right pairing for it, and when I saw Helen’s beautiful watercolour swimwear fabric I was sold. As the watercolour design is subtle, I decided to make the straps also from the fabric, letting the fabric really shine. The straps were easy to make, 4cm bias strips folded as binding and sewn together using a three step zig-zag stitch. I did contemplate using my coverstitch in construction but opted for a three step zig-zag for a little more control. Experimenting is one thing, but experimenting on a coverstitch is a whole other layer I just didn’t want to faff with.
As I wanted a sport bra, a double layer main front was a must, I did consider creating pockets for padding inserts, as well, I am small chested, but in the end just went for a main and lining second layer. As I was creating the top much like a lined bodice, the top elastic was sandwiched between the two layers which was a little fiddly, I used 1cm picot elastic as it was the only white elastic in my stash, if I was to do this again I would use a 6mm elastic as the 1cm width is very visible on wear.
The back strapping was sandwiched in-between the two layer side seams, I omitted the channeling specified in the pattern at this point as it was quite fiddly to get the straps to sit flush with the top of the front bodice (another construction order change I would embark on). As channeling was omitted, the sides do pull and it is not a straight side seam, this bugs my analytical perfectionist mind but it is the by product of just not enough stability in the side seam. I am still not sure if I would add channeling in the future to provide added stability, I am inclined to add a third layer of main fabric and build the side seam with binding.
The bottom mesh layer was finished with fold over elastic, creating a nice clean finish and utilising the last of my stash navy elastic from rowsuit making. I added bar tacks to the cross over junction between vertical and horizontal strapping, this allows for greater support at the back and just eases the whole wearing process without having to adjust the strap positions on each wear.
My favourite part of this make are the straps, I just love the watercolour wash of them and the contrast with the navy stretch mesh is beautiful. Even with the experimentation imperfections I am really happy with the finished product. It is satisfying to finally complete this make, it has taken a number of years for a few hours of sewing, but I am so so happy I stuck with it as it is so comfy to wear, and just looks wonderful.


